
Bandanas are back!!!

This is the last bandana post for a while---I swear....kinda. I just keep finding new ways to love them. LOVE THEM!!! This is basically just the bandana shirt without straps, but who does not need a new summer skirt???? I DO!! PLUS another pair of shoes out of retirement---I love these RED ones!!!

Anyway I may never wear anything else to church. Now that I know I can make a skirt for 2 bucks....anything else seems a little silly:)

By the way...my mom hates the way I stand. She has ALWAYS said I stand like a duck and I have ALWAYS stood that way...not sure why??? I guess 9 years of ballet lessons don't get you much these days--ha ha:)
Anyway...I decided to make a tutorial for the bandana shirt/skirt for 3 reasons. 1. because I got more e-mails, comments, and even phone calls about this post than any before. AND 2. because when I first started making clothes (a few months ago), I needed VERY CLEAR directions. AND 3. because I needed something to do while I watched the American Idol Final.
SO here it is...

YEP... I made another one:)
For the shirt you need 3 bandanas--only 2 for the skirt. Plus some 1 inch wide (or whatever you want) elastic.
First, you need to put your hankerchiefs right sides together and sew down each side. I made sure to put the words on the top so that they would not show. I also sewed the side seams about 1/8 inch away from the edge because I wanted the shirt to be as wide as possible (I am not as small as I used to be).

Next, fold the top down about 1 1/4 to 1 1/2 inchs. I just folded over until it lined up on with the blue edge because I did not want to measure. IRON.

Then, sew about 1/8 to 1/4 inches around the folded down top portion to make an elastic casing. Leave a 2 or so inch opening so that you can thread the elastic through. Make sure to go pretty straight because this will be visible on the outside of the finished shirt:) Just a tip.

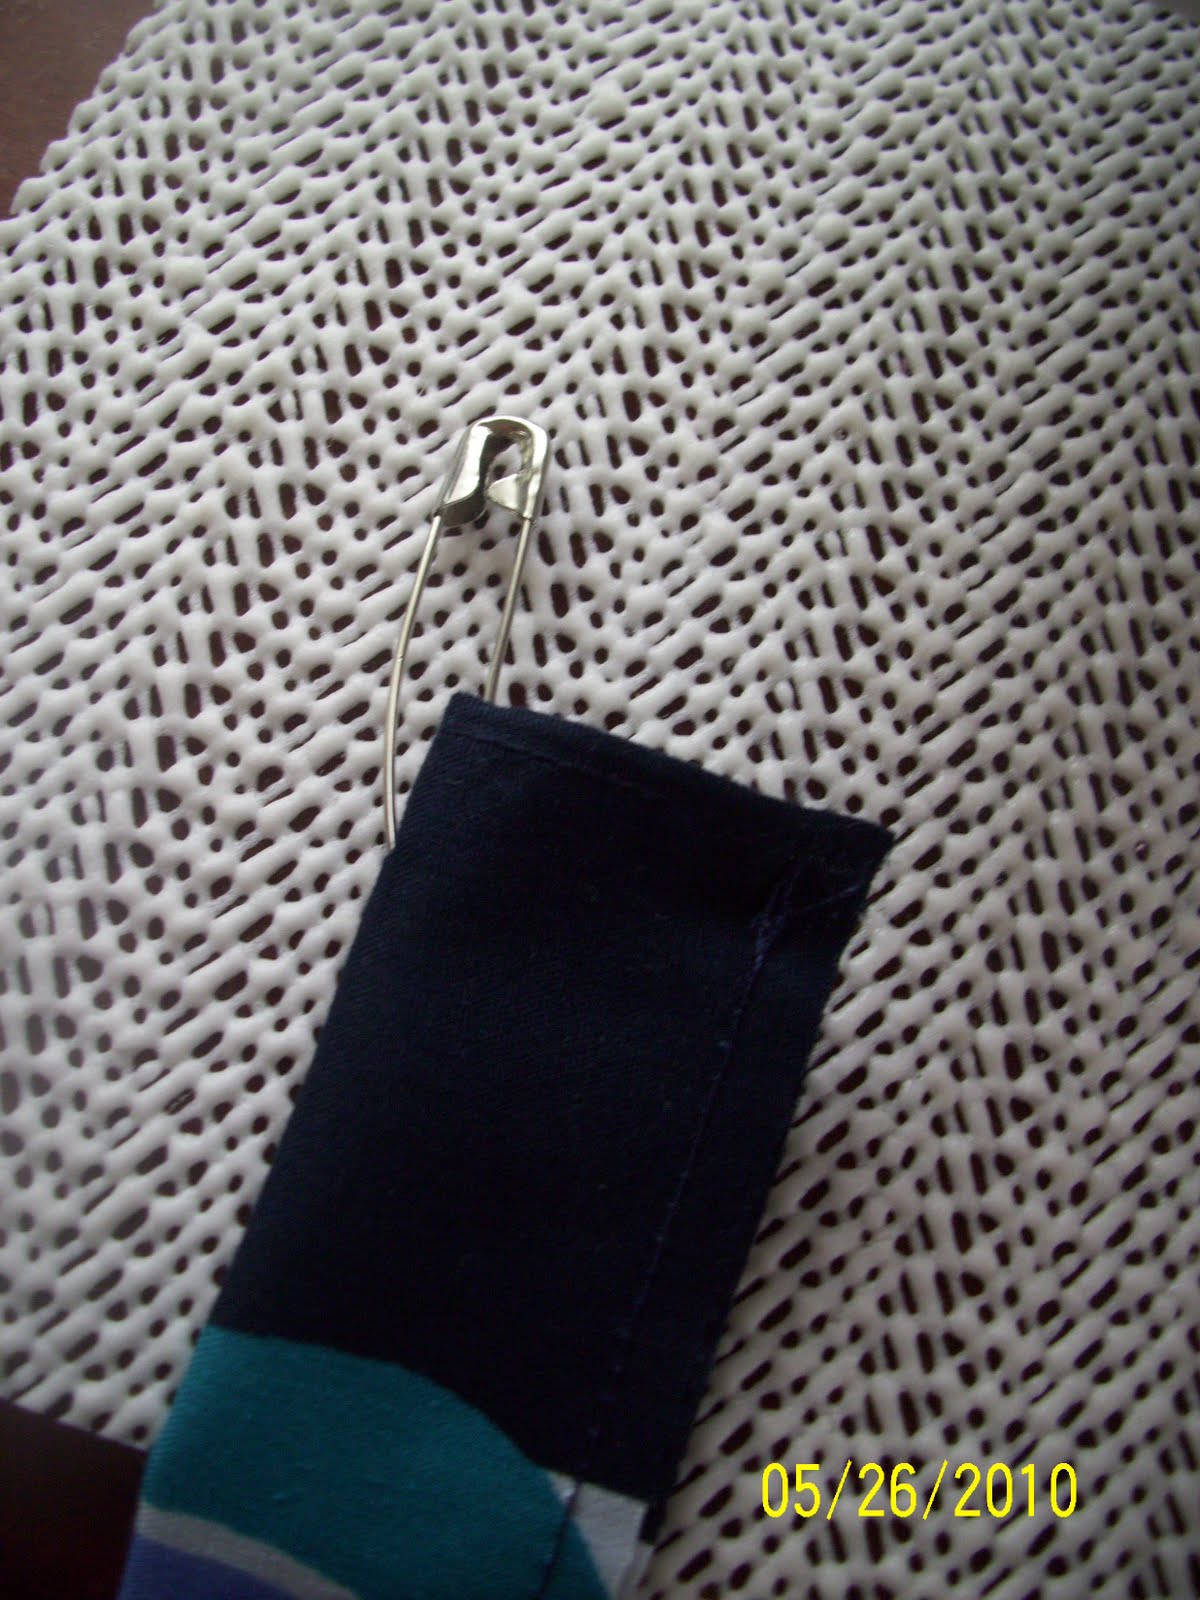
After that, take a piece of elastic (I used 1 inch wide) and wrap it around your chest so that it fits really snuggly. Cut it to the length that you want and then put a safety pin on the end of it. Use the safety pin to thread the elastic through your new amazing elastic casing.

Once you get the elastic all the way around. Take the 2 ends and overlap them by about an inch or so. Make two rows of zig zag stitches to hook them together. I found a new trick this time around. FOR EVER when I sewed elastic it would get bobbin vomit on the back side. Anybody know what I mean??? Just a bunch of thread spit out on the backside. WELL that is what happened to me. BUT I found that if you turn the bobbin tension up to like 7 while sewing over the elastic it makes nice clean stitches----no vomit. FYI.

Then sew your little hole shut (the one you threaded the elastic through). Now rotate your elastic around so that your side seams are lined up on either side---you don't want a crooked crack:) Then you are left with this...
 '
'Check out my little helper's toes--even her toes are the cutest!!♥ WELL...you can stop now and have a cute cute skirt....or you can keep going and make some straps. Hmmmmm???? decisions decisions????
OK--for the staps I used the 3rd hankie and cut 2 strips that were 2 1/2 inches by the length of the hankerchief. If you want a little wiggle room, you could go 2 3/4 inches on the strips---mine were tough to get the elastic through---but I am not so great at straight line sewing either....your choice.


Fold your strip in half and sew 1/8 inches all the way down the long edge (on both straps). I zig zagged along the edge too. I doubt it was necessary, but the material is super cheap and flimsy and I didn't want my straps falling apart--again, your choice.


Take your tube, hook another safety pin on, and poke it down through the strap. This will flip it right side out.

After you get it turned right side out, get the seam lined up on one side and iron the strap flat. This will be the back of the strap.

One more time with the safety pin. Hook it to the elastic and poke it down into the strap. Scoot the pin down and through until it comes out the other end--make sure you don't lose the first end though.

Once you get the elastic through, sew the elastic down at both ends of the straps. This just keeps it in place while you hook it to the shirt. I sewed about 1/4 inch from the edge (through the elastic and the strap).

Next, it is time to attach the straps. To do this, I put the shirt on over a tank top that I like. I lined the staps up with the straps of the tank I was wearing and then pinned them onto the shirt. Then I took the shirt off and sewed the straps onto the front of the shirt. Make sure the seam is down the back of the strap (not showing when you wear it). I sewed about 1/8 inchs away from the edge--forward and then back stitched across to make it secure. AGAIN--make sure to make this a straight seam because it will be visible right on the front of the shirt.

For the back straps I placed the straps a little (about an inch) further in (closer together). I did this for 2 reasons. 1. so that the back is different than the front (makes it easier when getting dressed). and 2. because this is how most of my bought tank tops are. SOOO I did it that way too:)

AND there you have it.... a new shirt...OR a new skirt.


I still have not made a dent in my supply of hankerchiefs.... the bandana party is just starting over here. Anybody else getting obsessed????


7 comments:
Shoot! I wish you would have posted this one earlier so I could have featured it with the shirt! Darling! Adorable! I will have to make one1
So very cute!!! I love this too. What a great idea. More reason's to buy bandannas!!! :)
I stumbled onto your blog from Camille's. And I think I'm hooked. You have such great ideas. Now you're making me want to go buy some bandannas! :) Such a fun idea. Who doesn't need a $3 shirt?
Will you just make me some of these? I will do your family history if you make me a cute skirt...
BTW- you should see what I have done. We are related to some cool people.
Love this! Thanks for the detailed tutorial - I'm the type that needs that :)
love, love, love this idea!!! I foresee an obsession with bandanas in my future! LOL
LOVE your blog....I am gonna be a follower! ;)
Thanks for this tutorial! I made a skirt tonight, so quick and cute! Can't wait to wear it to church on Sunday! I was going to make the shirt....but forgot to buy the 3rd bandana! Next time!
Post a Comment